Beef Chilli

Beef Chilli always seems to go down well with most people, we love it in our house.

It’s one of those dishes you can just throw together, I don’t think any two of my chillies I’ve cooked have been the same!

I have put this recipe together though to cover the basics and a few tips to help you with the cooking techniques.

Tomatoes

For me a Beef chilli has to be heavy on the tomatoes. Skimp on the tomatoes and your going to end up with a lacklustre dish. Don’t forget in some parts of the US a Chilli is referred to as ‘A big bowl of red’, well where do you think that red comes from?

I recommend using a hefty amount of tomato paste, a teaspoon just isn’t going to cut it here! I also add tinned tomatoes as well.

Spices & Herbs For Your Beef Chilli

Chilli has its origins in Mexico. Chilli Con Carne is really just a poor imitation of a Mexican Mole. Just because it’s an imitation though doesn’t mean it can’t be a great dish in it’s own right.

So thinking about the Mexican influence, the spices that you simply must have are chilli (obviously), ground cumin and oregano. I also add fresh coriander but that may not be to everyones taste.

A little cinnamon works nicely too but I’ve missed that out on this recipe. If you want to try it add a 1/4 teaspoon and see how you get on with that.

Sweet & Sour

A lot of dishes that are tomato based need something a little extra to bring it together. A combination of something sweet and sour works wonders.

For this recipe I’ve kept it simple and just used a little sugar and vinegar. You could replace the vinegar for a squeeze of lime.

Beef Chilli Chillies!

Obviously chillies are a major part of a chilli! You don’t have to use fresh though. If you have no fresh just increase the amount of dried your using.

Fresh chillies do add a nice zing though and of course you can play around with the varieties your using. In this one I used a combination of standard red chillies and Scotch Bonnets.

Also you could try getting a variety of dried chilli pods and grinding your own chilli powder. I particularly like a combination of Ancho, Pasilla, Mullato and chillies de Arbol.

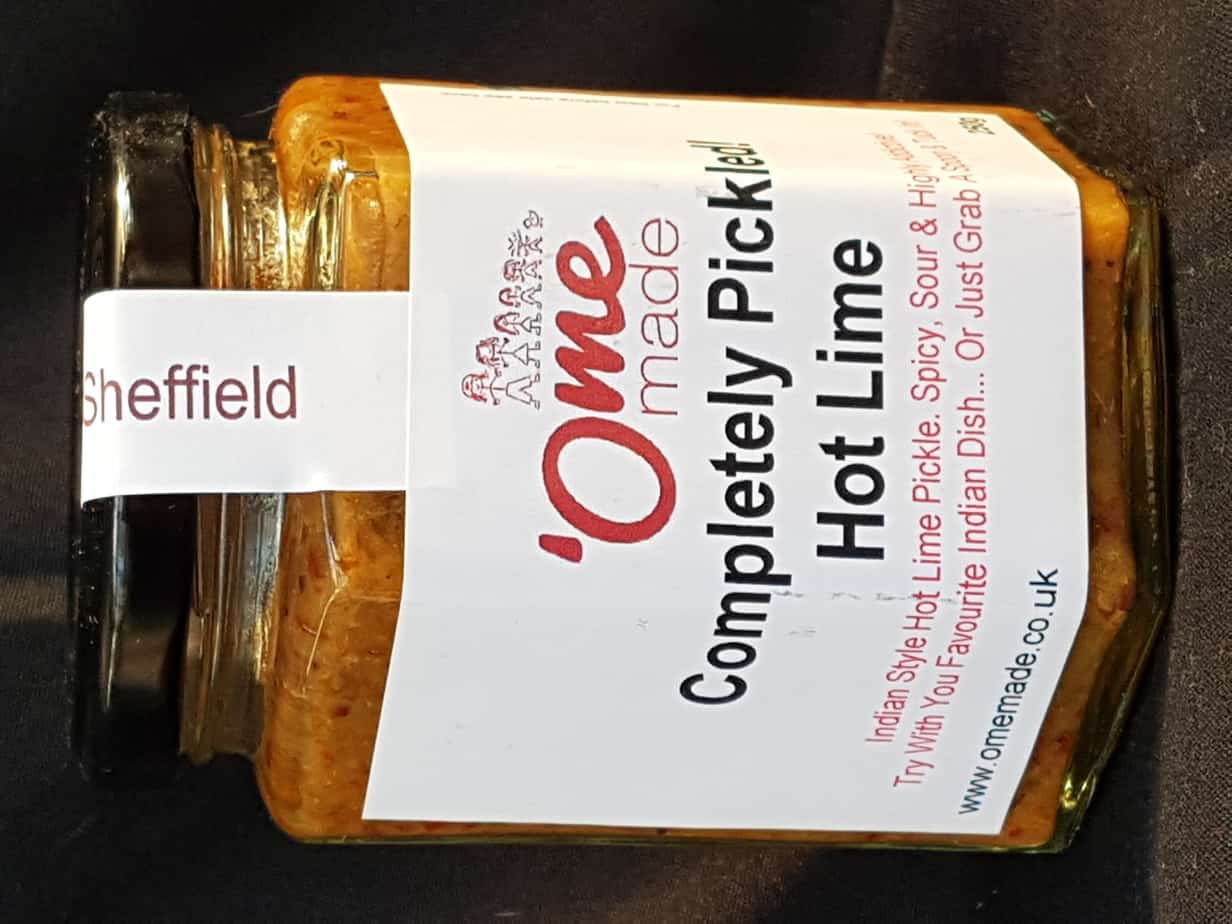
Of course you could try adding one of my ‘Ome Made Rub-a-Dub-Rubs to the mix. I have 2 which are South American based and ideal for a chilli. They are Spirit Of The Jaguar Rub-a-Dub-Rub and Adobo Loco Rub-a-Dub-Rub. You can find them here omemade.co.uk

Cooking

To get the best flavours you need to cook your chilli correctly. It’s quite easy.

First off, get those onions cooked. You want to cook all the moisture out of the onions, the salt helps drawer the moisture out. You then want to bring out the natural sweetness of the onion by slightly caramelising the onion, which is why you cook it ’till it’s starting to turn a pale brown colour.

Brown your meat. Simple, it seals it and caramelises all those lovely juices. To achieve this make sure you have a pan big enough so the meat can spread out, if it’s overcrowded it will just steam.

Evaporate any liquid before adding the tomato paste, if you do you know you’re concentrating all those flavours in the pan and everything is going to be cooked out correctly.

And that’s about it, Here’s the recipe. Enjoy and don’t forget to add your own embellishments to make it your perfect Chilli recipe!

Beef Chilli

A basic recipe for a spicy, tomato rich beef chilli.
Prep Time 15 minutes
Cook Time 1 hour
Total Time 1 hour 15 minutes
Course Main Dish
Cuisine American
Servings 4 people

Ingredients
  

  • 500 g minced beef
  • 150 g dried beans I use a mix of kidney and pinto, soaked overnight. Or you could use tinned (400g tin will be fine)
  • 1 medium onion diced
  • 4 cloves garlic finely chopped or grated
  • 1.5 tbsp oil (neutral flavoured)
  • 1 tsp salt
  • 2 each red chillies Add more or less to taste, If you like it hot, try some fresh Scotch bonnets.
  • 1 each red pepper diced
  • 1 tsp ground cumin
  • 1 tsp chilli powder or to taste
  • 1 tsp 'Ome Made Adobo Loco Rub-a-Dub-Rub (optional)
  • 2 tsp sugar
  • 2 tsp vinegar White/red wine or cider work best
  • 1 each beef stock cube
  • 40 g tomato paste (a hefty tablespoon)
  • 400 g chopped tinned tomato
  • 400 ml water an empty tomato cans worth!
  • 1 tbsp fresh oregano finely chopped (use 1 tsp dried to replace fresh)
  • 1 tbsp fresh coriander finely chopped (optional)
  • 6 good turns of freshly ground black pepper

Instructions
 

  • Drain the beans and cover with fresh water plus an inch. Bring to the boil and boil for ten minutes. Once boiled turn down to a simmer and cook for a further 20 minutes then drain.
  • Heat the oil in a heavy bottomed pan and add the onion and salt. Cook gently for 10 minutes until the onion is starting to brown.
  • Add the garlic to the pan and fry for 20 seconds.
  • Add the minced beef to the pan. Stir to break up and cook until browned.
  • Add the dried spices and black pepper to the meat and continue to fry for a minute.
  • Add the fresh chillies and red pepper and stir
  • Add the sugar, vinegar and the crumbled stock cube, turn up the heat to reduce any liquid in the pan.
  • Once most of the liquid has evaporated add the tomato paste and fry for a further 20 seconds or so,
  • add the tinned tomatoes plus 1 can full of water.
  • Add the cooked and drained beans, the oregano and coriander.
  • Cook on a gentle simmer for 50 minutes to and hour, add more water if needed. Or alternatively put in a slow cooker to finish cooking, give it a t least 3 hours. Or you can put in a low oven at 100C for at least 3 hours but up to 5. Just check the liquid levels and add more water if needed.
Keyword Beef, carne, chilli, con

BBQ Rubs & Seasonings

BBQ Rubs & Seasonings are available to buy from the ‘Ome Made Online Store!

Summer is almost upon us, hopefully bringing some fine BBQ weather.

At ‘Ome Made we have a selection of BBQ Rubs & Seasonings to suit all tastes. Perfect for all the grill addicts out there!

BBQ Rubs & Seasonings are a vital part of the outdoor, summer cooking season. If it’s perfect pulled pork you’re after or you just want to season some steaks or chicken ‘Ome Made BBQ Rub-a-Dub-Rub is an American style dry rub perfect for rubbing in to meat before it is simply grilled or smoked low ‘n’ slow.

Pulled Pork made with 'Ome Made BBQ Rubs & Seasonings.

American Style BBQ Rubs

As well as our traditional BBQ rub we now have more American style seasonings.

For something different on a low and slow brisket why not try our Wake Up & Smell The Coffee Rub-a-Dub-Rub? A blend of spices, sugar and coffee. It may sound weird but it gives a lovely deep, savoury flavour with a touch of sweetness. It’s not just for brisket though it works on anything you want to grill too!

We have our Golden Green Rub-a-Dub-Rub which is a blend of yellow mustard, dill and other herbs and spices. This is great rubbed straight in to pork or it can be made in to a paste to smother pork shoulder or brisket so that your chosen coating will stick to the meat while being cooked, giving you two layers of flavour!

If you’re after simpler flavours we have Man! Fire! Rub-a-Dub-Rub. A combination of Salt, garlic, onion, spices and herbs. Great for bringing out the flavours of low and slow cooked meats but equally suitable for just chucking over something on the grill!

For something a little more spicy ‘Ome Made Fuego Furioso Rub-a-Dub-Rub (furious fire!) is great for sprinkling on to your food before it’s barbecued or adding to other rubs to give a little more Oomph! Its a combination of different dried chilli peppers, salt and pepper that will really liven up your BBQ!

If you want something that isn’t so spicy we do a range of Rub-a-Dub-Rubs which are more traditional and great used as BBQ Rubs, we have;

Pork – Perfect for joints, steaks or burgers.

Chicken – Great for seasoning thighs, whole or spatchcocked birds.

Beef – For seasoning burgers, steaks or if you want a simple flavoured piece of brisket.

Lamb – Use to season lamb burgers, steaks or a whole shoulder or leg done low ‘n’ slow

Chicken BBQ Rubs & SeasoningLamb BBQ Rubs & Seasoning

BBQ Rubs & Seasoning World Flavours!

‘Ome Made do a range of rubs which take influence from around the world…

Portuguese Rub-a-Dub-Rub is based on the classic flavours of Portuguese Piri Piri. We love this rubbed on to a small whole or spatchcocked chicken before cooking indirect on the barbecue.

Portuguese Chicken

Moroccan Rub-a-Dub-Rub takes all the earthy, warming flavours of North Africa and goes brilliantly with lamb. Try rubbing in to a whole leg with a little garlic, lemon juice and olive oil before cooking indirect on the barbecue… a real treat! It also makes agreat BBQ rub for chicken.

Moroccan Slow Roast Lamb

We also have Jerk Rub-a-Dub-Rub and Cajun Rub-a-Dub-Rub. Always a favourite to rub in to some chicken and throw on the BBQ for a real crowd pleaser!

If it’s Kebabs you’re after why not try ‘Ome Made Ultimate Kebab Rub-a-dub-Rub. whether it’s chicken or lamb skewers. Minced meat Donner style, skewered Chicken thighs or pork this is a great allrounder!

BBQ Rubs & Seasonings. Ultimate Kebab-Rub-a-Dub-Rub

Indian On The BBQ

We love Indian food here at ‘Ome Made!

While it might be a tad to warm for a Madras or Vindaloo, that doesn’t mean Indian food has to get shelved!

We have some Indian inspired BBQ Rubs perfect for the summer months.

Try some Seekh kebabs made with our Indian Kebab Masala or one of our favourites, some Chicken Tikka or even a whole Tandoori Chicken using our Tandoori Masala & Kashmiri Masala

BBQ Rub - Tandoori Masala

For The Full Range Of ‘Ome Made Products Click Here!

‘Ome Made Kebab

‘Ome Made Kebab

I have been fond of kebabs since my beer swilling teenage years… You could not beat that garlicky, salty meat stuffed into a pita with slice cabbage, grated carrot, raw onion, sliced tomato and cucumber then drizzled with lemon juice, yoghurt & mint and hot chilli sauce after a night out on the beer!

Of course once I had kids, nights out were a thing of the past and a greasy donner kebab became something I’d have once in a blue moon.

Kebab

And then I noticed that when I was having them I was enjoying them less and less. The meat seemed to have less flavour, you got less salad,yoghurt and mint seemed to not be an option and ask for lemon juice and you got funny looks. And why can’t you get a kebab in a pita anymore?

It seems that a lot of takeaways standards have dropped these days. And to be fair there is a lot of dubious establishments out there selling things they shouldn’t be to make a bigger profit. Not that I want to tar all takeaways with the same brush… there are of course some excellent takeaways out there.

The thing is, sometimes you just fancy a kebab. So it’s handy to be able to make your own.

If I had my way I would have a big rotisserie spit in one corner of the kitchen but I don’t think Kit would approve!

'Ome Made Kebab


So how do you get something that tastes and has the texture of a Doner meat?

I’ve found the best method is what I refer to as ‘The Big Sausage’ method!

So here’s how you make it;

You will need

1 kilo lamb mince (or beef, or a mixture)

3-4 cloves of crushed garlic

1 teaspoon salt

3 teaspoon ground cumin

1 teaspoon ground coriander

1 teaspoon chilli powder

1 teaspoon cinnamon

1 teaspoon dried oregano

Plenty of black pepper

1/2 tablespoon oil

Put all the ingredients in a large mixing bowl. The best way to mix is with your hands, so get in there and give it a good squish. The more like a paste you can get it the better.

Once all the ingredients are well combined get a large sheet of greaseproof paper and a large sheet of tinfoil.

Lay the greaseproof paper on top of the tinfoil and then get your meat mixture and lay it out in a line, round about 12” long. Now mold the meat into a ‘Big Sausage’ shape. Once you have a rough sausage shape you can roll it in the greaseproof paper to get it nice and round and compact. Wrap your ‘Big Sausage’ in the greaseproof and then the tinfoil. Lay the package on a baking sheet or dish (some juices may escape) and put in an oven at about 165°C (145°C for fan assisted)for around 80 – 90 minutes.

The meat will now be cooked. To serve slice the meat thinly and place on a baking sheet before giving it a flash under a hot grill.

Kebab

The meat can then be served in a pita bread with Turkish Salad, yoghurt and mint and of course a good dollop of chilli sauce (preferably ‘Ome Made!) or as I’ve done here in a gigantic Naan bread which is then rolled up and sliced (and by the way if you wrap it tightly in cling film and put in the refrigerator overnight, it slices really nice and is ideal served cold on a picnic or as pack-up).

Cheeky Cow!

Mike, our butcher, had got a couple of Ox Cheeks in. I’ve never had them before but I thought I’d give them a go.

I’d read about them and understood that they needed a nice slow cook. Apparently they make an absolutely wicked chilli, or should that be cheeky chilli!Ox Cheek 1

 I think the bit of Irish in me had attuned to the fact that St Patricks day was approaching so I decided to cook these cheeky chappies in Guinness (other stouts are available…)with a few flat mushrooms, carrots and onions and serve them with a good dollop of Champ, that comforting dish of mashed potato with spring onions and lots of butter!Champ 1

I have to say that I was not disappointed with the results. After quite a few hours of cooking I had a gorgeous dark gravy and the cheeks were moist and succulent and had a lovely beefy flavour that reminded me of a cross between beef shin and Ox tail.

Ox Cheek 8


 The Cheeks went a long way too. They are quite rich due to the gelatinous nature of them so a little seems to go a long way. You shouldn’t pay a lot for them either which makes them a real bargain.

With the leftover meat, champ and gravy I made some potato cakes with the meat in the middle, baked them in the oven and served them with some peas and the leftover gravy… I’ll tell you something, leftovers don’t get much better!

I would recommend anyone to give Ox cheeks a go. They are a very forgiving meat to cook as long as they are cooked for plenty of time, they are cheap and extremely tasty. Don’t be put off by the look of them or the part of the animal they are from. They really are delicious which is probably why all the celebrity chefs are coming out with recipes for them… lets hope they don’t succeed in pushing up the price of these cheeky little morsels!

Ox Cheek 2

Recipe (to serve 8 adults)

 2 Ox Cheeks (about 900g – 1 KiloOx Cheek 3

1 large or two medium onions chopped

2 garlic cloves chopped

4 large carrots cubed/sliced

8 – 12 flat mushrooms sliced

Plain flour (some)

About 400ml beef stock

2 x 500ml bottles of Guinness

1 or two star anise

1 Tablespoon muscavado sugar or other dark sugar

Pinch of thyme

Good pinch of salt to taste and a really good grind of black pepper

For the Champ

 2 kilo peeled potatoes

2 bunch spring onions (12-16)Champ 2

50 gram butter

200ml milk

 Method

 When we had this we prepared it the day before we were going to have it so that it could be put straight in the oven to be ready for teatime. It’s a good idea to do if you have a busy day.

 First off dice your onions and finely chop your garlic and fry gently in a large oven proof pan. Add the carrot, thickly sliced and continue to gently fry.

 Prepare your Ox Cheek by taking off the outer thick bits of fat and any thick bits of membrane. Don’t worry too much about the state of your cheeks being perfect, after a long slow cook they’ll be fine.

 Once the onion has softened and the carrot is stating too take on a bit of colour add your cheeks to brown.

 Heat your stock ready to go in the pan.

 Once your cheeks are nice and brown sprinkle over some flour to roughly coat everything in the pan. Continue to cook gently for a couple more minutes.Ox Cheek 3

Add your stock a little at a time while giving everything a bit of a stir. You should end up with a thick paste. If it’s a little lumpy don’t worry as after a long cook it should cook out.

Now pour in your two bottles of Guinness. Remember to do a quality control taste on each bottle before adding!

 Ox Cheek 4

Add the rest of the ingredients and bring to a simmer.

Ox Cheek 5


Ox Cheek 6


Once the liquid has come to the simmer you can either take off the heat, cool and refrigerate to cook the next day or it can be put in the oven to finish off.

The Stew can be cooked,covered, on 165°C for three hours or 150°C for about six hours. We put our stew straight in the oven from the fridge. We put it in a cold oven set to 150°c where it stayed for three hours and then we turned it up to 160°c for another three hours, after which it was cooked perfectly. The cheeks were lifted out of the gravy to rest while the gravy was put in the oven uncovered to reduce slightly.

As for the champ, well thats dead easy. Peel and cut your potatoes into approximately 1 1/2’’ chunks. Plonk into a pan and just cover with water, bring to the boil and simmer for about 30 minutes or until tender. Drain the potatoes and put on a very low heat until the steam almost stops (meaning all the excess water has evaporated and you’ll have nice fluffy potatoes).

While your potatoes are finishing, put the onions, milk, butter and seasoning in a pan and warm gently allowing all the flavours to infuse.

When your potatoes are ready give them a good mashing and then fold the milk, butter and onion mixture into the potatoes.

Once your ready to plate up the Ox cheeks can be sliced or pulled apart with a fork. Simply put a dollop of Champ into a dish, place some Ox cheek on top then ladle some gravy over the top. We finished our dish off with a little purple sprouting broccoli.

 Ox Cheek 9

A nice cheap meal that really tasted like something you should be paying a lot of money for in a trendy ‘Gastro’ pub.

Happy St Patricks Day everybody… enjoy your Guinness, in moderation… of course!


Burger It!

veal burger

We love a good burger in our house.

We don’t have them very often so when we do it’s a real treat.

Our children have never been to a McDonalds, Burger King or any other junk food purveyor.

I can imagine that when they do (although I’d like to think they never will…) it will be a real eye opener for them. I can just see them going back to the counter with the sad little burger in hand… “What’s this? You call this a burger?”


I don’t know why more people don’t make their own? You can buy a kilo of mince meat for a lot less than it costs for a kilo of burgers. All you need to do is add a bit of seasoning, mix and form into a rough Pattie and throw on a grill, BBQ or frying pan.

Veal burger mix

However you can let your imagination run wild and flavour your meat with a vast array of ingredients.

And then you have your toppings, now this is where the fun starts!

You have to have cheese of some sort. I love a slice of Monterey Jack on a beef burger, but a medium cheddar is just as nice. If you want to ‘Posh’ it up I would go with some crumbly Stilton. One of my favourite burgers is a Mediterranean influenced lamb burger topped with a piece of grilled Halloumi and some ‘Ome made Tzatziki.

 veal & chorizo burger

I like a nice mustardy mayonnaise on my beef burgers along with a little salad leaf, slice of tomato and I’m sorry but gherkins are good too. I also think a beef burger needs a good squirt of tomato ketchup.


Lately we have been making veal burgers. I know that some people are a little put off by veal but the place that we get it from uses the male animals from the place that they get their milk supplies from. If the animals are not sold for meat then they would be slaughtered at birth anyway. So personally I haven’t got a problem with eating veal that’s a by-product of the dairy industry, and from some where that has high standards for animal welfare.

Mince veal has quite a delicate flavour and it makes a really nice burger that compliments other ‘add ons’.

Heres a recipe you might want to try but feel free to add your own ‘add ons’ as everyone has different tastes. The burgers could be made with any sort of meat though.


Ingredients

1.2Kg veal mince (or beef or lamb), Waitrose often have a deal on veal mince, hence the amount which would cost £10

1 teaspoon salt

1 teaspoon sugar

A really good grind of black pepper

A couple teaspoons of mustard. Dijon or wholegrain works best


And that’s it, although you could add other things if you fancy. Get your hands in the bowl and give it a really good ‘squish’ to thoroughly mix the ingredients into the meat.

I then line a tray with greaseproof paper, form the meat into burgers, place on the tray and chill which lets the burgers firm up a little. If you’re finding you have more meat on your hands than tray a tip is to shape the burgers using slightly wet hands. You may notice on the photos that we made some little meat balls from the same mixture, these were used in the Kids’ pack-up for their school lunch (I never got pack-up as good as theirs!), they would be equally as good in a tomato sauce with some pasta for a quick lunch or supper.

Veal burgers and balls

 And that’s it your burgers are ready to go and be cooked using your preferred method.

Burgers & Chips cooking blog

So we had these little beauties topped with Chorizo, Monterey Jack cheese, an ‘Ome made tomato and habenero chilli salsa and some rocket and baby spinach leaves all sandwiched in a mini Ciabatta bun with a squirt of American style mustard spread on for good measure.veal chorizo & Monerey Jack burger

The salsa is really easy too if you want to have a go. Just dice some tomatoes, onions and chillies (which can be left out if you don’t want the heat). Add enough sugar to lightly coat the mixture, a little splash of vinegar and a good squirt or squeeze of lime juice. It now needs a good pinch of salt (I personally like a nice salty salsa)and a good grind of pepper. Again a salsa can easily be customized to your own liking. tomato salsa

We had these with some nice chunky baked chips and a little more salad leaf on the side.

Be prepared for juice dribbling down chins and arms, but then that’s all part of the enjoyment!

And don’t forget to tell you’re kids how much nicer and healthier Home-made burgers are compared to the high street, mass produced crap of fast food vendors!

MissT Veal Burger Blog


BBQ Short Ribs

Short Ribs Feature BlogSo one Friday I get a call from Mick the Butcher… “Jez” (Yeah, I know it’s Jerome or ‘Ome, I’ve never been a Jez but then Mick is Mike so I guess we’re even!) “I’ve got some Highland short ribs in d’ya want ’em?”

It turns out that a restaurant had ordered them but then decided at the last minute to change their mind, more fool them… what a treat!

The beast that the ribs hailed from came from a very well looked after herd of Highland Cross (Cross as in crossed with another breed not a bit ticked off… although if they knew what was coming I’m sure they’d be pretty livid!) cattle that reside about ten minutes walk from our house. Well you can’t get much more local than that!


If you have never cooked short ribs at first glance they seem particularly fatty. However you have to remember that these tasty hunks of meat need slow cooking at a temperature that allows the fat to render down and flavour the rest of the meat before being given a blast on a high heat to crisp up the remaining fat.Ribs n Rub

When it comes to cooking big chunks of meat I have to admit that the Americans seem to have it right. So, dry rub of spices, seasoning, sugar and herbs it is before a last minute glaze of something slightly sweet and spicy… I just know that the kids are going to get messy for this tea time!

The best thing to have with these ribs is a nice side of chips… or fries if you want to be really Americanised, salad and a nice vinegary ‘slaw’ to cut through the richness of the meat. We even had a squirt of tomato ketchup to finish it off, to be fair it went really well!


Cooked Short Ribs


BBQ Short Rib Of Beef


I used 4.5 Kilo of ribs which would feed 8 hungry people. They do heat up quite well so if you have any left over you could always freeze until needed or you could halve the amount if you wanted to do less.


Dry Rub

2 tablespoon paprika

2 teaspoon smoked paprika (If you have it)

2 teaspoon chilli powder

1 tablespoon ground cumin

2 tablespoon Muscavado sugar (or dark brown or molasses)

2 teaspoons of salt

a good grind of black pepper

1  tablespoon dried oregano


Mix all the ingredients together and then rub into the ribs using your hands. The ribs can then be left to marinate up to 24 hours.


To cook preheat the oven to 220°C/428°F (slightly less if using a fan oven).

Place the ribs on a rack in a large roasting dish. Cover with a double layer of foil and then place in the oven. Turn the temperature down to165°C/330°F (145°C/290°F if using fan assisted oven).

The ribs can now be left to cook for 6 hours.


Sweet Chilli Glaze


50ml of vinegar (white wine or cider)

50ml water

2 tablespoon caster sugar

1 teaspoon chilli powder (or more if you like a real kick!)

dash of ‘Ome Made Chilli Sauce (or your favourite hot sauce)

1 tablespoon Tomato Ketchup

pinch of salt/pepper

1 teaspoon (about 1 clove) of crushed garlic

Put all the ingredients into a saucepan, bring to a boil and simmer gently for 20 minutes


Once the ribs have finished their slow cooking take out of the oven and turn the oven temperature up to a  high heat (alternatively the ribs can be finished on a BBQ or can be left to cool and finished off another day)

Take the foil off the ribs and using a pastry brush give the ribs a good coating of glaze all over.

Put back in the oven (or on a BBQ) for 20 minutes. After 20 minutes take out of the oven again, give another coating of glaze and cook for a further 20 minutes after which the ribs should look shiny, sticky and slightly charred, if not cook for a little longer.Shortribs

Once finished leave the ribs for ten minutes or so before serving, you don’t want to take the roof of your mouth off while eating… the ribs can be like the food equivalent to Napalm!

Oh… and make sure you have a hose ready to clean the kids down with afterwards!


The Ultimate Beef & Potato Pie…


After a fantastic Summer the temperature has dropped and it’s looking a little gloomy outside… (although now I am writing this it seems Summer is making a comeback!) but that’s ok, it means it’s time to start cooking those lovely comforting foods!

And what could be more comforting than a big old fashioned Meat & Potato pie, or two!

Beef Pie

It was handy that our friendly butcher had just had delivery of a nice highland cross cow then (cross as in hybrid breed, not a bit ticked off!)

When I’m slow cooking beef for stews or pies I love to use the shin. After hours of cooking it is lovely and tender, sticky and sweet and it gives your gravy soooooo much depth of flavour and because of the gelatinous nature of the cut it naturally thickens your gravy too.

As a bonus, because we had the whole shin we got to take the bones away too to make a lovely ‘Ome-made beef stock.

And of course I couldn’t resist popping along to the local off licence (Cheers Mr Mitchell!) to get a couple bottles of ale to make the gravy with. I used Badger Breweries Poachers Choice. A lovely dark beer flavoured with Damsons. It always reminds me of Autumn and Winter. It’s one of those beers that gives you that lovely warm fuzzy feeling, ideal for drinking on a cold winters night around an open fire.  Of course some of the beer didn’t make it into the finished product!

Poachers Choice

So we have lovely rare breed, high welfare beef. ‘Ome-made beef stock to make the gravy, enriched with some rich fruity beer. A crumbly, butter laden, golden pastry crust… It all sounds fantastic but I’m sure there is something missing?

Of course! A good friend to share it with!. Cue Pete, now lets get stuck in!


First job is the stock.


If you don’t have the bones, the time or you just rather wouldn’t make your own then that’s fine. Just replace with bouillon or stock cubes.

I made this the day before I made the pie as I wanted to use the stock to cook the meat in.

So, I used the whole shin bone. Mick at the farm shop kindly cut it into three pieces so that it could fit in our stock pot.

Shin Bones

First of all I roasted the bones a few carrots and a couple of onions in a moderate oven for roughly 45 minutes. this just starts to caramelise the flesh, fat and sinew that’s left on the bones which will help give your stock a deeper flavour and a lovely dark colour (in fact to help with this I sprinkle a bit of sugar over!).

I then put the bones, onion and carrots in a stock pot, covered with water and put on to boil. whilst the water comes up to the boil I added 1 star anise, roughly 5 bay leaves, a teaspoon of black pepper-corns and a generous pinch of thyme. The stock can now be left for a couple of hours (ours was on for about four!) simmering away.

Beef Stock cooking

After a few hours, or more if you have the time, you need to take the bones out of the stock and strain the stock into another pan. You can now add your ale, wine or anything else you want to flavour the stock with. This then needs to be reduced by about two thirds by boiling vigorously.


If there is any marrow left in the bones, scoop it out and whisk it into the stock to enrich it. In our case if MissT is knocking about then it won’t make it that far, she absolutely loves bone marrow!

The stock needs to cool and ideally be refrigerated so that the fat can solidify and be skimmed off. It is then ready to use.

                                                                                   Finished Beef Stock

Cooking The Pie filling


I cooked the meat in big pieces. This allowed me to cook the meat for a long time to allow the fat and connective tissue to break down, make the meat melt in the mouth, add flavour and texture to the finished gravy.

I used 3 Kilo of Shin. This made 2 pies to feed 10 – 12 hungry people. Of course you could easily half the amount or if you can’t manage two pies you can freeze one portion of the cooked mixture to make another pie or a stew at a later date.


Generously coat your meat with seasoned flour (the easiest way to do this is to put the flour in a plastic bag, add your meat a bit at a time and give it a good shake!).

Browning Shin

Heat some oil in a heavy bottomed pan and then gently fry your meat until it has a nice golden colour. then add your stock to just cover the meat. bring to a simmer, cover and then put in the oven at 130°C/260°F for four hours.

In our case we now took the kids to their  swimming lessons (which takes about three hours!). If however you don’t have swimming lessons to do then I could recommend; mowing the lawn, cleaning the chickens out, fixing the leak under the sink or best of all going for a nice pint at your local!

Once the meat is cooked it can be taken out of the gravy put on a plate and covered with cling film to keep it moist.

The rest of the filling can now be added to the gravy to cook. I used around 1/2 Kilo of potatoes in big chunks, a couple of carrots cut up in big chunks a couple of medium sized onions roughly sliced and about 250g of baby button mushrooms left whole. Just chuck the whole lot into the gravy and then put back into the oven at 175°C/350°C for about an hour or until your potatoes are just cooked through.

The Pastry

I used short crust this time around. You could use puff (bought from the shop is fine) or rough puff. if you have a favourite recipe for pastry then you could use that. For two pie lids I used roughly 1 kilo of flour, so adjust your recipe to suit. I rubbed in 375g of butter to 1 kilo of flour with a couple of level teaspoons of salt added. I would normally use some lard (300g butter and 75g lard) however I had run out so to the mixture I added a couple tablespoons of beef suet. In the end it worked rather well!

Once the fat is rubbed into you flour add enough cold water (I throw a couple ice cubes in the water to really chill it) to just bring the pastry together. briefly knead and then wrap in cling film and leave to rest for at least twenty minutes.          Making Pastry


Creating The Pie


While your veg is finishing cooking make a thick roux by melting roughly 55g of butter in a heavy based pan. Once sizzling add approximately 2 tablespoons of flour and stir for a minute until you have something that resembles golden brown putty. Put to one side. This will be whisked into your gravy to get a perfect consistency.

select your pie dishes and break the meat up into them. I like to leave it fairly chunky.

Using a slotted spoon remove your cooked veg from the gravy and place among the meat.

Beef Pie Filling

Put the gravy back on a gentle heat. You can now add any extra flavourings you want. I added a generous splash of Worcestershire sauce. You want a nice thick gravy for your pie so whisk in the roux you prepared earlier, a little at a time until you have the desired consistency.

Ladle the gravy over your pie mixture. You want some of the filling to be peaking out so the pastry has something to sit on top of. You should have a little gravy left over to serve along side your pie.

Roll out your pastry to cover your filling. It wants to be just under a centimetre thick. Place the pastry over the pie dish. don’t stretch it over. You want a bit of give to allow for the pastry shrinking. Trim the edges and put a couple holes in the middle to allow steam to escape. Decorate with the excess pastry if you want and then generously egg wash the pie topping.Beef Pie Lid

The pie now needs to be cooked for 50 minutes to an hour on 195°C/380°F   (if using a fan oven reduce the temperature by about 20°C/70°F).              Once your pie is golden brown and your filling red hot the pie is ready, however it will benefit from being left for fifteen minutes or so before serving.

We had ours with Mushy Peas (or as Pete called them ‘Steeped Peas’) and gravy.

Plated Beef Pie Pies don’t come much better than this and when you have the fantastic company of an old friend it makes for a memorable meal!

 Pete & Pie!

Oh… and Mick, that beef… simply the best!


Venison Chilli

Our Butcher sometimes gets some very nice wild venison in. When he does we always make sure that we get some venison neck in, we usually buy quite a bit for the freezer. Venison neck when cooked long and slow is great. It makes fantastic curries but this was a first for us. I can honestly say though that this chilli was one of the finest I’ve ever tasted!venison chilli blog

We put this in the oven at 165 C and then turned it straight down to 115 C and there it stayed for a good eight hours! I don’t see why it couldn’t be cooked for less time on a higher heat though? I would say that at 165 C for four hours would be fine, any less I would expect the venison not to be quite so melt in the mouth.

This recipe gives a medium (to us!) heat level. Although our kids like spicy, too hot and they start to grumble. Kit and myself simply added some ‘Ome-Made Chilli Sauce to ours.

If you can’t get venison neck you could always do this recipe with chuck steak or even beef shin would give a good result. There is no reason why you can’t even stick to the traditional minced beef.

You will notice that the recipe makes a lot but if your going to have the oven on for that amount of time you may as well do extra! It freezes and reheats well so gives some hassle free meals in the future.

Venison Chilli (makes approximately 12 portions)

1 kilo/2lb Diced venison (or meat of your choice)

500g/1lb dried beans (I used red Kidney beans and pinto beans) soaked over night or couple tins of beans of your choice

4 big fat cloves of garlic, choppedvenison chilli cooking blog

3 medium onions

3 teaspoons ground cumin

3 teaspoons chilli powder (I used 1 standard hot, 1 new Mexico and 1/2 of bhut jolokia but not everyone has these hanging about in there cupboards)

1 tablespoon dried oregano

1 large glass of red wine (or anything else ‘moist’, beer, lager or even cola), don’t forget one for yourself too!

2 tins (280g in total…ish) tomato puree

1 400g tin chopped tomato

2 tablespoon sugar (granulated will do)

3 beef stock cubes or 1 tablespoon beef bouillon or some strong beef stock (approximately 1/2pint/280ml)

50g of seriously dark chocolate (at least 70% but I used 85%)

Plenty of freshly ground black pepper and salt to taste


Method

Drain and rinse the soaked beans put in a pan, cover with water and bring to the boil. Boil for ten minutes then drain.

Heat 2 tablespoons oil in a large pan

Fry the garlic and onion until soft

Add the spices and continue to fry for a couple minutes, if they are catching add a splash of water.

Add your meat to the pan and brown, stir in the oregano and season with salt and pepper.

Add your wine or beer (if you haven’t drunk it all yet!) and whack the heat up to reduce the liquid to a nice thick consistency.

Reduce the heat and add your tomato puree and cook for 2 minutes or so now add your tomatoes, sugar, stock cubes (or stock) and par-cooked beans (if using tinned add an hour before serving) and enough water to cover everything + 1/2 inch, bring to the simmervenison chilli chocolate blog

Break your chocolate up roughly (remembering to taste to check for quality!) and sit on top of the chilli, let it melt slowly before stirring it into the liquid. now put a lid on the pan and put into a pre-heated oven at 165 C/330 F and then turn down to 115 C/240 F where it will stay for eight hours (or less if you decide to cook on a higher temperature, see above)

Go and enjoy the rest of your day knowing that all you have to do for tea now is cook a bit of rice!


Smoking!

you may have noticed that there are a few references to slow cooked smoked meats on the Blog. You wouldn’t be wrong.

I recently acquired a big American style smoker/BBQ and it’s been getting a fair bit of use.slow roast lamb blog

I love proper American food, I’m not talking McD****ds or K*C here but big hunks of meat coated in secret dry rubs and cooked slowly for hours on end. Pulled Pork, sticky ribs, slow cooked brisket even a humble chicken simply seasoned and cooked in the smoker for three hours is transformed into something remarkable.

And then served with sour cream, chilli sauce, bbq sauce with a multitude of different “slaws” to go with it, quality.

I even like a simple beef burger, ‘Ome made of course! Given the right treatment, a nice cheese or two to top, gherkin, onion, tomato and some nice crisp iceberg and some lovely, mustardy mayonnaise (which has to dribble down your chin!) and of course a good squirt of ketchup. Burgers can, and should, be good and a real treat to eat.

Anybody remember a certain burger I created?

So yes there maybe some recipes for smoked meats or BBQ food on the Blog, that doesn’t mean that a conventional oven can’t be used. However I can recommend getting a smoker, it is such an enjoyable and slightly addictive way of cooking!