Mutton Curry

Rich & Spicy Mutton Curry Recipe

I do like chicken and lamb in a curry. Sometimes though you want a more traditional dish, cooked long and slow. Mutton is ideal for this. Mutton Curry is ideal if you’re looking for an Indian dish for a special occasion. We had this dish as part of an Indian meal.

Where To Get Mutton?

It’s not something you’re going to get from the supermarket!

Ask your local butcher or get some direct from the farm yourself.

If you’re in the Sheffield area you could pay a visit to Whirlow Hall Farm Shop. It’s where we got ours from but it is advisable to give them a bell first to make sure they have some in.

Be warned though. I only went in for Mutton and make a delivery but came out with mutton and a hefty piece of Sirloin steak! It was calling me!

If you are struggling to get mutton you can use lamb, just cut down on the cooking time. You could even use chicken thigh but again decrease the cooking time further.

What Cut Of Mutton For A Mutton Curry?

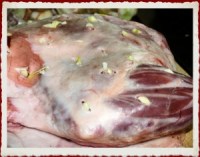
This is entirely up to you. I just asked for a little over a kilo of diced. I think it was shoulder. To be honest any cut will be good enough for a mutton curry. As it needs slow cooking any fat will render down and give a lovely rich sauce. If you want a really traditional Indian dish you could of course cook the mutton on the bone. This way you will get even more flavour in your gravy.

How Spicy Is Spicy?

Most of the spice in this recipe comes from Kashmiri chilli. This recipe isn’t blow your head off spicy. It’s quite easy to adjust the spiciness by either using more chilli powder or adding more fresh chillies. I added some whole fresh birds eye chillies towards the end of cooking to give it an extra kick.

If you like the look of this curry you may want to have a look at my recipe for Lamb Madras

Rich Spicy Mutton Curry

Slow cooked diced Mutton with onions, garlic and ginger in a rich tomato & yoghurt sauce, thickened with cashew nut paste.
Prep Time 30 minutes
Cook Time 3 hours 30 minutes
Course Main Course
Cuisine Indian
Servings 6

Ingredients
  

Marinade

  • 1 kg mutton diced
  • 3 garlic cloves crushed
  • 3 tsp chopped ginger
  • 6 tsp Kashmiri chilli powder use 3tsp chilli powder and extra 3tsp sweet paprika if you can’t get hold of Kashmiri
  • 6 tsp sweet paprika
  • 1 tsp salt
  • 1 tbsp yoghurt

Curry

  • 1 onion sliced
  • 2 onions pureed in a food processor
  • 6 cloves garlic finely chopped or grated
  • 1 inch cube piece of ginger finely chopped or grated
  • 4 tbsp of oil or ghee
  • 2 sticks of cinnamon or cassia bark
  • 2 whole star anise
  • 12 fresh curry leaves if you have them
  • 1 tsp of salt
  • 3 tsp tomato puree dissolved in 300ml of hot water
  • 140 g cashew nuts just covered with hot water and left to soak for 20 minutes and then blended
  • 1 tbsp of ‘Ome Made B.I.R Curry Masala (or other curry Masala)
  • 400 g tinned tomatoes pureed in a food processor with 3 red chillies (more if you like heat, or fewer for a milder curry)
  • 500 g natural plain or Greek yoghurt
  • 1 tbsp of Kasoori methi or fenugreek leaf
  • 2 tsp dried mint
  • 2 tsp of ‘Ome Made Garam Masala or any other brand
  • 1 tsp of ground all spice optional
  • 1 tbsp of sugar jaggary or a dark sugar is better
  • 2 limes juice of
  • 1 bunch fresh coriander chopped
  • Salt to taste
  • Toasted almond flakes optional

Instructions
 

  • Put the mutton to marinate overnight or for at least 3 hours.
  • Heat the oil in a heavy bottomed pan
  • Add the sliced onion and gently fry until brown and caramelised. Once the onion is browned remove from the pan with a slotted spoon and reserve for later.
  • Add the curry leaves, cinnamon and star anise to the pan (careful they may splutter)
  • Add the onion puree and 1 tsp of salt. Continue to fry gently for 15 minutes
  • Add the garlic and ginger and fry gently for 30 seconds
  • Add the curry Masala and fry for 20 – 30 seconds
  • Add the mutton and any marinade, stir and let seal
  • Add the watered down tomato puree, stir and let reduce back down to a thick paste.
  • Add the blended tinned tomatoes and chillies. Bring back to a simmer
  • Add the yoghurt and cashew paste, stir and again bring back to the simmer.
  • Turn the pan down and cover with a lid. Either cook on a very gentle heat on the hob (use a heat diffuser if you have one) or cook in the oven on a low temperature around 140°C. It wants to cook for around 2 ½ – 3 hours. If the sauce is looking to thick after an hour of cooking then you can thin it with a little water.
  • After 2 ½ – 3 hours you can add all the other ingredients, including the caramelised onions from earlier (keep a few almonds and coriander leaves back to garnish if you wish). Cook for another 20 – 30 minutes on the hob, lid off, before serving with pilau rice & Indian style breads.
Keyword curry, Indian, Mutton, spicy

Beef Chilli

Beef Chilli always seems to go down well with most people, we love it in our house.

It’s one of those dishes you can just throw together, I don’t think any two of my chillies I’ve cooked have been the same!

I have put this recipe together though to cover the basics and a few tips to help you with the cooking techniques.

Tomatoes

For me a Beef chilli has to be heavy on the tomatoes. Skimp on the tomatoes and your going to end up with a lacklustre dish. Don’t forget in some parts of the US a Chilli is referred to as ‘A big bowl of red’, well where do you think that red comes from?

I recommend using a hefty amount of tomato paste, a teaspoon just isn’t going to cut it here! I also add tinned tomatoes as well.

Spices & Herbs For Your Beef Chilli

Chilli has its origins in Mexico. Chilli Con Carne is really just a poor imitation of a Mexican Mole. Just because it’s an imitation though doesn’t mean it can’t be a great dish in it’s own right.

So thinking about the Mexican influence, the spices that you simply must have are chilli (obviously), ground cumin and oregano. I also add fresh coriander but that may not be to everyones taste.

A little cinnamon works nicely too but I’ve missed that out on this recipe. If you want to try it add a 1/4 teaspoon and see how you get on with that.

Sweet & Sour

A lot of dishes that are tomato based need something a little extra to bring it together. A combination of something sweet and sour works wonders.

For this recipe I’ve kept it simple and just used a little sugar and vinegar. You could replace the vinegar for a squeeze of lime.

Beef Chilli Chillies!

Obviously chillies are a major part of a chilli! You don’t have to use fresh though. If you have no fresh just increase the amount of dried your using.

Fresh chillies do add a nice zing though and of course you can play around with the varieties your using. In this one I used a combination of standard red chillies and Scotch Bonnets.

Also you could try getting a variety of dried chilli pods and grinding your own chilli powder. I particularly like a combination of Ancho, Pasilla, Mullato and chillies de Arbol.

Of course you could try adding one of my ‘Ome Made Rub-a-Dub-Rubs to the mix. I have 2 which are South American based and ideal for a chilli. They are Spirit Of The Jaguar Rub-a-Dub-Rub and Adobo Loco Rub-a-Dub-Rub. You can find them here omemade.co.uk

Cooking

To get the best flavours you need to cook your chilli correctly. It’s quite easy.

First off, get those onions cooked. You want to cook all the moisture out of the onions, the salt helps drawer the moisture out. You then want to bring out the natural sweetness of the onion by slightly caramelising the onion, which is why you cook it ’till it’s starting to turn a pale brown colour.

Brown your meat. Simple, it seals it and caramelises all those lovely juices. To achieve this make sure you have a pan big enough so the meat can spread out, if it’s overcrowded it will just steam.

Evaporate any liquid before adding the tomato paste, if you do you know you’re concentrating all those flavours in the pan and everything is going to be cooked out correctly.

And that’s about it, Here’s the recipe. Enjoy and don’t forget to add your own embellishments to make it your perfect Chilli recipe!

Beef Chilli

A basic recipe for a spicy, tomato rich beef chilli.
Prep Time 15 minutes
Cook Time 1 hour
Total Time 1 hour 15 minutes
Course Main Dish
Cuisine American
Servings 4 people

Ingredients
  

  • 500 g minced beef
  • 150 g dried beans I use a mix of kidney and pinto, soaked overnight. Or you could use tinned (400g tin will be fine)
  • 1 medium onion diced
  • 4 cloves garlic finely chopped or grated
  • 1.5 tbsp oil (neutral flavoured)
  • 1 tsp salt
  • 2 each red chillies Add more or less to taste, If you like it hot, try some fresh Scotch bonnets.
  • 1 each red pepper diced
  • 1 tsp ground cumin
  • 1 tsp chilli powder or to taste
  • 1 tsp 'Ome Made Adobo Loco Rub-a-Dub-Rub (optional)
  • 2 tsp sugar
  • 2 tsp vinegar White/red wine or cider work best
  • 1 each beef stock cube
  • 40 g tomato paste (a hefty tablespoon)
  • 400 g chopped tinned tomato
  • 400 ml water an empty tomato cans worth!
  • 1 tbsp fresh oregano finely chopped (use 1 tsp dried to replace fresh)
  • 1 tbsp fresh coriander finely chopped (optional)
  • 6 good turns of freshly ground black pepper

Instructions
 

  • Drain the beans and cover with fresh water plus an inch. Bring to the boil and boil for ten minutes. Once boiled turn down to a simmer and cook for a further 20 minutes then drain.
  • Heat the oil in a heavy bottomed pan and add the onion and salt. Cook gently for 10 minutes until the onion is starting to brown.
  • Add the garlic to the pan and fry for 20 seconds.
  • Add the minced beef to the pan. Stir to break up and cook until browned.
  • Add the dried spices and black pepper to the meat and continue to fry for a minute.
  • Add the fresh chillies and red pepper and stir
  • Add the sugar, vinegar and the crumbled stock cube, turn up the heat to reduce any liquid in the pan.
  • Once most of the liquid has evaporated add the tomato paste and fry for a further 20 seconds or so,
  • add the tinned tomatoes plus 1 can full of water.
  • Add the cooked and drained beans, the oregano and coriander.
  • Cook on a gentle simmer for 50 minutes to and hour, add more water if needed. Or alternatively put in a slow cooker to finish cooking, give it a t least 3 hours. Or you can put in a low oven at 100C for at least 3 hours but up to 5. Just check the liquid levels and add more water if needed.
Keyword Beef, carne, chilli, con

Chicken Tikka Masala With Paneer & Chilli

Chicken Tikka Masala

Chicken Paneer Tikka Chilli Masala

Chicken Tikka Masala is a favourite in the ‘Ome Made house. Only thing is, we have to have it a little hotter. Madras hot is about right for us. Paneer is also a great addition. If you’re not a fan or you’re struggling to get hold of some, it can always be left out.

Chicken Tikka Masala

Chicken Tikka & Paneer

For this recipe I use chicken breast which I coat with a basic Tandoori Marinade and bake in the oven. I also coat the paneer in the marinade as well and bake that alongside the chicken.

For this recipe I use 1kg of chicken and 400g of paneer. This will feed the six of us with a little left over for 2 more light meals. If you want less just halve the ingredients.

Paneer Tandoori

For the marinade I take 4 teaspoons of ‘Ome Made Tandoori Masala (you can use your own mix or another brand) and mix that with about 4 tablespoons of plain yoghurt. I also added about half a teaspoon of red food colouring powder, this is optional as it’s purely cosmetic.

I leave the chicken breasts whole, just scoring the tops of them slightly to help the marinade stick. I also leave the paneer whole in a block. It’s a lot easier and less fiddly to cut the paneer in to blocks and slice the chicken after they’re cooked. I also like the contrast of the red marinade on the outside against the white interior of the chicken and paneer.

The chicken and paneer want cooking in a pre-heated oven at 200℃ for around 25 minutes.

Onion Paste

Onions frying

Quite often when I’m cooking curries I will purée the onions, garlic and ginger before frying. However for this recipe I fry sliced onions with a little salt until they are starting to caramelise. I then add sliced garlic, ginger and fry some more before adding some chopped coriander stalks, some diced red pepper and sliced chilli. The mixture is then cooked to soften the peppers before being left to cool so it can be blended in a food processor.

This paste is the fried again before adding the spices and everything else.

This method gives a lovely deep and sweet, from the natural caramelisation of the onion, base to build the curry on.

Frying Mix For Chicken Tikka

Spices

For this curry I use my ‘Ome Made B.I.R Curry Masala which is a Madras style masala with a few added extras to give that authentic Indian restaurant flavour. Of course you could make up your own masala, or use one of the recipes from the many curry chefs out there such as Mistys, Dans or Als! And of course you could use any shop bought curry masala/powder.

I also use Kashmiri Chilli powder. This is mainly to give a deep rich red colour. If you haven’t got any either leave it out or use a little sweet paprika instead. Also I add some chilli powder for some heat. If you don’t want extra heat and prefer a more ‘traditional’ Tikka Masala, then leave the chilli out.

Tomatoes

For the tomatoes in this curry I use a little tomato purée and tinned tomatoes. The tinned tomatoes get blitzed in the food processor for that smooth texture that you get in an Indian restaurant or takeaway.

If you haven’t got a food processor you could get a way with cooking the onion etc and instead of pureeing them as described above you could carry on adding the spices, tomato purée and then use a stick blender to blitz the whole lot in the pan.

I think that about covers everything.

Chicken Tikka Masala

If you want to read some more about curries have a look at my other post British Indian Restaurant Curry.

So here is the recipe… enjoy!

‘Ome Made Falafel


Falafel are great… or can be if they’re made right! The thing is you need to put bags of flavour in there. You need serious amounts of garlic, lemon juice, pepper and salt. And then of course there’s the spices. For me it has to be heavy on the cumin, probably my favourite spice and a little paprika and ginger help give an extra zing to the proceedings. A good handful of fresh herbs give the finishing touch.

Falafel are surprisingly easy to make. The main ingredient, chickpeas, are incredibly cheap too!

I like to have Falafel just as they are accompanied by a nice salad, maybe some Tabbouleh and lashings of Tzatziki Oops, I’m beginning to sound like a vegetarian!

Once cooked they can also be warmed in a sauce, a nice rich tomato sauce works well. They’re almost like a vegetarian version of a meatballs.

So here’s a recipe you can follow to make your own. It uses dried chickpeas which have to be soaked overnight. I’m sure if you wanted you could cheat and use tinned, if you do you’ll want about double the amount of dried.

‘Ome Made Falafel

You will need:

  • 500g dried chickpeas
  • 6 cloves garlic finely chopped
  • 1 medium onion finely chopped
  • 3 teaspoons ground cumin
  • 1 teaspoon ground coriander
  • 1 teaspoon ground ginger
  • 1 teaspoon paprika
  • 1 teaspoon chilli
  • 1 tablespoon chopped fresh coriander
  • 1 tablespoon lemon juice
  • 1 teaspoon dried mint
  • 1 teaspoon allspice
  • 1 teaspoon salt
  • Freshly ground black pepper
  • 1 heaped teaspoon baking powder

Method.

Soak the chickpeas overnight. Drain and rinse the chickpeas then grind to a course pulp in a food processor.

Mix in all the other ingredients using your hands to really work the mixture together.

Form into 4cm balls and place on greaseproof paper on a tray in a single layer.

To cook the Falafel are best deep fried or shallow fried and then finished off in an oven.If deep frying the oil wants to be around 160°C so that they will cook through without the outside getting too well done Take the Falafel out of the oil when they are firmed up and just starting to colour. The Falafel can be par cooked like this and then cooled and refrigerated or frozen. The Falafel can then just be popped into an oven to finish cooking.

Alternatively the Falafel can just be deep or shallow fried.

Have Your Cake & Eat It… Just not until Christmas!

Last year I posted a blog on Stir Up Sunday with a recipe for Christmas Pudding. Click on this link ‘Christmas Pudding’ if you want to see it.

This Year I’m giving a recipe for Christmas Cake. You may think it’s a bit early but this cake tastes better for a bit of maturing. Put it this way. Last year we made two cakes. We started the second in the Summer holidays it was superb and still lovely and moist (something to do with the alcohol content me thinks!). In fact this year I’m wondering whether to do extra so we have a cake for next Christmas too!

Crimbo Cake 1

This recipe will give a large 10″ cake and a smaller one. Or you could try two 8″ size tins. It depends on what sort of depth you want on your cake.

You can use whatever dried fruit you like in your cake. I put mainly vine fruits in mine with a little currants and angelica. If you want to push the boat out a few dried Morello  cherries and cranberries make a luxurious addition.


Traditional Christmas Fruit Cake


800g Mixed dried fruit

300g nibbed almonds

200g glace cherries

100g crystalized ginger (roughly chopped)crimbo cake 2


Soak the above in 350ml of port, 350ml brandy and 1 bottle of Kreik overnight (or whatever alcohol you like)


4 medium eggs beaten

zest and juice of 2 oranges

200g melted butter

2 teaspoons of cinnamon and a good grating of nutmeg

1 teaspoon of all spice (pimento)

200g Muscavado sugar

2 tablespoons of black treacle

300g self raising flour


crimbo cake 3


Method

Once your fruit has had it’s alcoholic bath simply put all the ingredients in a very big basin and give a very thorough mix.

Pre-heat the oven to 150°C/gas mark 4.

Grease and line your baking tins/moulds.

Fill your tins leaving at least 3cm gap from the top.

Bake in the oven for 2 hours 20 minutes to 2 hours 40 minutes.

If the top is browning a bit too quickly loosely cover with a little baking parchment.

Too check if the cake is done pierce the centre with a bamboo skewer. The cake is done when the skewer comes out virtually clean.

Leave the cakes to cool in the tin then take out.

Pierce the bottom of the cake with a skewer. Now you can feed your cake with whatever spirit you like! I find Brandy works the best but Whiskey also gives a great result. Simply spoon some alcohol over the cake and let it soak in. This can be repeated every 2 to 3 weeks or every week as it nears Christmas. Once the cake has had it’s first feed, wrap in greaseproof/baking paper then tin foil and then cling film. We keep ours in a cool box in a cool place.

We don’t ice our cake as we tend to enjoy it with a nice slab of vintage Cheddar and glass of wine, Port or Madeira but of course you can cover it with marzipan and icing of your choice or try glazing with some warmed apricot jam and decorating with nuts or glace fruit.

The only hard part I find about making this cake? Waiting until Christmas to eat it!

I wish I could have my cake and eat it now!

crimbo cake 4


Things That Go ‘Pump’ In The Night!

It’s that time of year again! It seems like the Kids have only just gone back to school and then the next thing you know Halloween is here!

We normally let the kids stay up a bit later on Halloween. They don’t go out trick or treating but they love it when other children come knocking on our door.

We have our own bag of tricks and treats to give out… we have a bag full of sweet things but lurking within are a few unpleasant surprises that I have made. In the past we have had chocolate coated sprouts, last year it was chocolate coated Fishermans Friends! This year… Ahhh, that would be telling!

Kit will have used her artistic skills to make them all masks. A task which needs a lot of patience! For those that haven’t got as much may want to head over to The Amazon Halloween Store

I’m sure we will have to have a pumpkin carved out. I can’t wait until the kids are old enough to do it themselves!

We tend not to cook something special for Halloween. If anything we’ll have some jacket potatoes and fillings. Easy to prepare and fuss free. Although we quite often have baked beans with them.

Now there’s nothing wrong with the tinned variety but you just can’t beat ‘Ome Made!

It’s really quite easy to make your own baked beans and of course it’s loads cheaper. You really can customize your recipe.

Here’s a recipe that I’ve used many times. I used to make these when I was working at a Bar opposite the Sheffield Crucible and Lyceum. There was one gentleman that used to come in especially to have beans on toast (even though it wasn’t on the menu!) because they were so good!

 ‘Ome Made Baked Beans

500g dried Haricot beans (soaked overnight in cold water).

800g of chopped tomatoes (tinned or fresh)

140g tomato puree.

250ml of water.

2 teaspoon of veg bouillon.

3 cloves of garlic

1 teaspoon of chilli powder.

2 teaspoons of paprika.

2 teaspoons of dried basil.

2 teaspoons of dried oregano.

2 teaspoons of dried parsley.

3 teaspoons of sugar.

Seasoning.

Method

Drain and rinse the beans. Place the beans in a pan and cover with water. Bring to the boil and boil for ten minutes. Turn down the heat and simmer for another twenty minutes.

Drain the beans and then put in a casserole dish or oven proof pan along with all the other ingredients. There should be enough liquid to cover the beans, if not add a little more water. Put a lid on the pan and place in an oven preheated to 160°C (140°C if fan assisted). The beans should be ready after 6 hours but could happily left for 8.

This basic recipe could easily be customized to your own liking. You could try adding some fried onion, bacon, a bit of diced pork or even sausages. A little diced carrot and/or celery gives your beans a bit more depth.

If your really brave you could make your own curried beans… just don’t blame me for the after effects!

Things really could go ‘Pump’ in the night!

Cheeky Cow!

Mike, our butcher, had got a couple of Ox Cheeks in. I’ve never had them before but I thought I’d give them a go.

I’d read about them and understood that they needed a nice slow cook. Apparently they make an absolutely wicked chilli, or should that be cheeky chilli!Ox Cheek 1

 I think the bit of Irish in me had attuned to the fact that St Patricks day was approaching so I decided to cook these cheeky chappies in Guinness (other stouts are available…)with a few flat mushrooms, carrots and onions and serve them with a good dollop of Champ, that comforting dish of mashed potato with spring onions and lots of butter!Champ 1

I have to say that I was not disappointed with the results. After quite a few hours of cooking I had a gorgeous dark gravy and the cheeks were moist and succulent and had a lovely beefy flavour that reminded me of a cross between beef shin and Ox tail.

Ox Cheek 8


 The Cheeks went a long way too. They are quite rich due to the gelatinous nature of them so a little seems to go a long way. You shouldn’t pay a lot for them either which makes them a real bargain.

With the leftover meat, champ and gravy I made some potato cakes with the meat in the middle, baked them in the oven and served them with some peas and the leftover gravy… I’ll tell you something, leftovers don’t get much better!

I would recommend anyone to give Ox cheeks a go. They are a very forgiving meat to cook as long as they are cooked for plenty of time, they are cheap and extremely tasty. Don’t be put off by the look of them or the part of the animal they are from. They really are delicious which is probably why all the celebrity chefs are coming out with recipes for them… lets hope they don’t succeed in pushing up the price of these cheeky little morsels!

Ox Cheek 2

Recipe (to serve 8 adults)

 2 Ox Cheeks (about 900g – 1 KiloOx Cheek 3

1 large or two medium onions chopped

2 garlic cloves chopped

4 large carrots cubed/sliced

8 – 12 flat mushrooms sliced

Plain flour (some)

About 400ml beef stock

2 x 500ml bottles of Guinness

1 or two star anise

1 Tablespoon muscavado sugar or other dark sugar

Pinch of thyme

Good pinch of salt to taste and a really good grind of black pepper

For the Champ

 2 kilo peeled potatoes

2 bunch spring onions (12-16)Champ 2

50 gram butter

200ml milk

 Method

 When we had this we prepared it the day before we were going to have it so that it could be put straight in the oven to be ready for teatime. It’s a good idea to do if you have a busy day.

 First off dice your onions and finely chop your garlic and fry gently in a large oven proof pan. Add the carrot, thickly sliced and continue to gently fry.

 Prepare your Ox Cheek by taking off the outer thick bits of fat and any thick bits of membrane. Don’t worry too much about the state of your cheeks being perfect, after a long slow cook they’ll be fine.

 Once the onion has softened and the carrot is stating too take on a bit of colour add your cheeks to brown.

 Heat your stock ready to go in the pan.

 Once your cheeks are nice and brown sprinkle over some flour to roughly coat everything in the pan. Continue to cook gently for a couple more minutes.Ox Cheek 3

Add your stock a little at a time while giving everything a bit of a stir. You should end up with a thick paste. If it’s a little lumpy don’t worry as after a long cook it should cook out.

Now pour in your two bottles of Guinness. Remember to do a quality control taste on each bottle before adding!

 Ox Cheek 4

Add the rest of the ingredients and bring to a simmer.

Ox Cheek 5


Ox Cheek 6


Once the liquid has come to the simmer you can either take off the heat, cool and refrigerate to cook the next day or it can be put in the oven to finish off.

The Stew can be cooked,covered, on 165°C for three hours or 150°C for about six hours. We put our stew straight in the oven from the fridge. We put it in a cold oven set to 150°c where it stayed for three hours and then we turned it up to 160°c for another three hours, after which it was cooked perfectly. The cheeks were lifted out of the gravy to rest while the gravy was put in the oven uncovered to reduce slightly.

As for the champ, well thats dead easy. Peel and cut your potatoes into approximately 1 1/2’’ chunks. Plonk into a pan and just cover with water, bring to the boil and simmer for about 30 minutes or until tender. Drain the potatoes and put on a very low heat until the steam almost stops (meaning all the excess water has evaporated and you’ll have nice fluffy potatoes).

While your potatoes are finishing, put the onions, milk, butter and seasoning in a pan and warm gently allowing all the flavours to infuse.

When your potatoes are ready give them a good mashing and then fold the milk, butter and onion mixture into the potatoes.

Once your ready to plate up the Ox cheeks can be sliced or pulled apart with a fork. Simply put a dollop of Champ into a dish, place some Ox cheek on top then ladle some gravy over the top. We finished our dish off with a little purple sprouting broccoli.

 Ox Cheek 9

A nice cheap meal that really tasted like something you should be paying a lot of money for in a trendy ‘Gastro’ pub.

Happy St Patricks Day everybody… enjoy your Guinness, in moderation… of course!


Curried Bakers Oven Lamb

Here’s a traditional English dish given an ‘Ome Made twist, to be fair it was Kits’ idea. I was just going to do the plain English dish of lamb shoulder baked on top of layers of potato and onion, which in it’s own right is delicious. Add some spice, herbs and a curry sauce though and it takes the dish to a completely different level… This really was scrumptious! This is a fantastic dish to prepare the day before so that you can bang it in the oven the next day, forget about it and get on with all those things you need to catch up on, take the kids out or… go to the pub!

  It really is simple. You will need a full or 1/2 shoulder of lamb. Some White potatoes, onions and garlic. I also used some dried mint, fresh coriander and some red chillies.


First of all slice some potatoes (skin on) thinly and some onions. These need to be layered in a deep buttered baking dish. I did about four layers adding seasoning as I went along. On the middle layer I put a heap of chopped fresh coriander, a couple of chopped red chillies and some dried mint. On the top layer I sprinkled some more mint and some black cumin seeds.


I then fried some mild curry masala in a little oil and added some chicken stock and let this cook for twenty minutes or so. Next prepare the lamb. With a sharp knife make a few slits in the meat and push in some pieces of garlic. Now rub the lamb all over with some Kashmiri Chilli powder and some ground cumin. Sit the lamb on top of the layered potatoes and onions and give it a good grind of black pepper and a good sprinkling of salt. Pour your curry sauce into the corners of the baking dish. You want enough so that it comes about 1/2 way up your potato and onion layer.


Now cover the whole baking dish with a double layer of foil, creating a tight seal.


When your ready to cook pre heat your oven to 200°c. Put the lamb in the oven and then turn the temperature down to 165°c Which means the lamb will be ready after about four hours (but should be fine up to six). If you want to cook it for longer (or your having a really long session in the pub!) then you can cook the lamb on 145°c. The lamb will then be ready after six hours but be even better after around eight hours. To finish the dish off, remove the baking dish from the oven. Carefully remove the lamb to a warmed plate or dish. The meat should be falling off the bone. The layered potatoes then need to go back in a hot oven to brown and start to crisp up. If the liquid is above the potatoes just spoon some off ’till you can see the top layer. Put the baking dish back in the oven for about twenty minutes.


To serve, pull apart the lamb, spoon out some potato into a dish and place the lamb on top, spoon a bit more of the curry sauce over. A nice dollop of natural yoghurt goes nicely with the dish but that’s all it really needs.


A tasty, warming and comforting dish for a lovely lazy Sunday. Give it a go!


Don’t forget you can buy ‘Ome Made Curry Masalas at www.omemade.co.uk

Sweet Potato & Red Chili Soup


Sweet Potato and Chilli Banner

Soup… We absolutely love it in our house. Not the tinned variety of course. It has to be ‘Ome-made! And it’s so easy to make. You take your favourite ingredients sweat them off in some butter add some stock, cook for a bit and then blitz. Not leek and potato soup though, that can’t be blitzed. That’s completely breaking the rules, that has to be… ‘lumpy’.


If you make your own stock it’s even better. Even if it’s chucking the bones from the leftover roast chicken in a pot and boiling for an hour, you will be left with a nicechicken stock blog base for a soup. Of course if your one of those non-meat eating types you can make a stock from those manky left over carrots at the back of the fridge any veg trimmings and some onion. If you roast the veg for 20 minutes or so you’ll get more flavour and a deeper colour to your stock too.


So heres a recipe for a soup I made the other day along with a recipe for some cumin, ginger and garlic croutons. If you don’t have the croutons with this soup I suggest putting the spices used to flavour them in the soup. Although this recipe has chillies and spices in it it is no way spicy. If you prefer it spicier just up the amount of red chili in the recipe.

  croutons blogcoriander and chilli blog

Sesoning Blog


Sweet Potato & Red Chili Soup


Ingredients 


50g butter                                                       Diced Potatoes Blog

1 medium onion roughly sliced

2 cloves of garlic roughly chopped

200g (a large baker) potato cubed

700g sweet potatoes (4 small or 3 medium)cubed

1 large carrot diced

1 teaspoon ground white pepper (or extra black if you haven’t)

1 teaspoon salt

1 heaped teaspoon mild curry massala (or curry powder)Diced Carrots Blog

1 teaspoon ground allspice

1 teaspoon dried thyme

2 litre of stock

2 medium sized red chillies deseeded and finely chopped

1 tablespoon chopped coriander

Ground black pepper and salt to taste


Method


Melt the butter in a heavy bottomed pan. Gently fry the onion and garlic for about 10 minutes.

Sweet Potato Sweating Blog

Add both types of potato and carrot to the pan along with the white pepper, salt, curry massala, allspice and thyme. Gently sweat all the veg off for a further 10 minutes stirring so the spices don’t stick and burn.

Add your stock which should just cover the vegetables. Bring to a simmer and cook for approximately forty minutes or until all the veg is cooked through and soft. Take off the heat and carefully blitz with a hand blender, blender or food processor.

Put back on the heat and add the remaining ingredients. The soup will be ready after 20 minutes.

 Sweet Potato Soup Blog


Cumin Ginger & Garlic Croutons


8 slices white bread

Olive oil

2 teaspoon crushed garlic

2 teaspoon cumin

1 teaspoon ground ginger

Salt and black pepper


Method


Cut the bread into cubes and put in a shallow roasting/baking tin.

Drizzle with oil and sprinkle with the garlic, cumin and ginger. Give the croutons a good toss and then sprinkle a little more olive oil on them and toss them again.

croutons cooking blog

Put in an oven preheated to 165°C on fan setting (185°C for conventional)the croutons will take 30 – 40 minutes but you need to regularly check on them and give them a shake or turn every 10 minutes or so.

Once the croutons are cooked they can be used straight away. Once the croutons are completely cool they can be put in a sealed container where they should be good for up to five days.

Sweet Potato Soup Banner

Happy soup making!


Crispy Cornflake Tart… For An Old Fart!

Most people I know seem to remember this from their schooldays… I don’t! What a deprived childhood I must have had!

It’s one of Kits favourites. I remember her telling me about it and I was just looking at her with a vacant “what are you on about?” look on my face.

Then Kit turns up with a slice from a little buttie shop up the road “see! Cornflake Tart!”.

OK, I have to admit, looks like I was missing out.

Kits’ workplace has a thing about colleagues bringing something in on their Birthday so when Kits came round I suggested a Cornflake Tart… (Hence the title of the Blog… not that I’m saying Kits old, or a tart… can someone pass me a shovel please!)

This really is the easiest thing in the world to make. If you have Kids they’ll love it! However I don’t see why kids should have all the fun! Everybody loves a bit of retro these days, and when it tastes this good!

Recipe

Shortcrust Pastry

225g plain flour

100g cold diced butter

Pinch of salt

1 tbsp icing sugar

Mix the dry ingredients and then rub the butter into the flour until it resembles breadcrumbs. Add 2 – 3 tbsp iced cold water to bring the mixture together. Leave to rest in a cool (not a fridge) place for 30 minutes.

Roll the pastry out to about 3mm thickness and use to line a greased flan/quiche tin or shallow baking dish. Prick (snigger!) the base all over with a fork.

Place some baking paper in the tin followed by some tin foil and then fill with some baking beans. Bake in a preheated oven at 200°C for 15 minutes. After 15 minutes take out of the oven and remove the baking beans, foil and paper. Put back in the oven for 5 minutes or so until the pastry is cooked and beginning to colour then take out of the oven.

Warm 150g – 200g of jam (Strawberry is traditional but I used raspberry for that nice hint of tartness against the sweetness of the topping) once the jam has loosened up pour into the pastry case and carefully spread out to cover the bottom evenly.

Cornflake Topping

120g golden syrup

75g butter

30g caster sugar

120g cornflakes

Melt the butter, golden syrup and sugar together in a pan. Once melted and bubbling take off the heat and add the cornflakes. Gently but thoroughly mix so all the cornflakes are coated then spoon onto the jam filled tart case. Gently spread the topping out so it is even then pop back into the oven for 5 minutes or so to set and firm up. Remove from the oven.

The tart is best eaten warm with a good dollop of custard but is equally as nice cold on it’s own. Just don’t try and sneak some when nobody’s looking as you may find yourself in detention!